Adding and Configuring Devices on the Dashboard
This guide walks you through registering your Fence Shield devices on the Safora dashboard. If you have not logged in yet, read the Dashboard Overview first.
- Log in at dashboard.safora-tech.com and open Safora Fence Monitor Configuration.
- You will see a list of your registered devices as they come online.
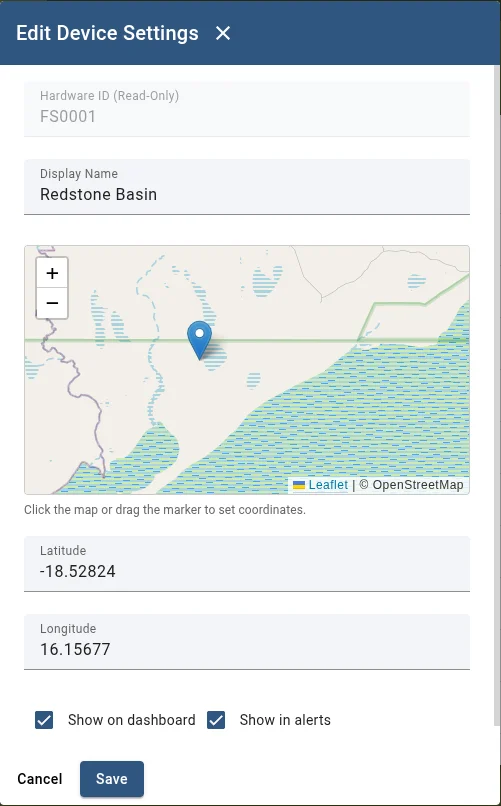
- For each device, press the pencil icon and fill in the following:
| Field | What to enter |
|---|---|
| Display name | A recognisable name for the device (e.g. the fence section or post number) |
| GPS coordinates | The coordinates you recorded during installation. You can also use the map to place a pin for the device |
| Active on dashboard | Check this to make the device visible in the Safora Fence Dashboard |
| Alerts enabled | Check this to activate notifications for this device. This applies to Telegram alerts and other integrations such as EarthRanger |
- Save your changes and repeat for each device.
Once a device is marked Active on dashboard, it appears as a marker on the Safora Fence Dashboard map, with further details listed below the map. Devices with Alerts enabled will trigger Telegram notifications and other integrations such as EarthRanger when an alarm fires.
To set up those notification channels, see mobile alerts or EarthRanger.